Friday, January 25, 2013


Keyboard shortcuts:
Like any good browser, Google Chrome has several dozen different keyboard shortcuts that can help improve your productivity. Below is just a few of our top favorites. 
Ctrl + 1-8 = Pressing Ctrl and any number 1 through 8 will move to the corresponding tab in your tab bar.
Ctrl + 9
= Switch to the last tab.
Ctrl + H
= Show history
Ctrl + J
= Open Downloads window
Ctrl + K = Move the cursor to the Omnibox (address bar)
Ctrl + T = Open a new tab.

Use the Omnibox to do more than just search:
The Google Omnibox does more than displaying the URL and allowing you to search. It is also capable of performing mathematical calculations (as shown in the picture) and even answer questions such as "how many cups are in 2 liters?" Try adding any math calculation now in the Omnibox without pressing enter to have the results shown. 

Sync Chrome with your Google account:
Chrome allows you to sync your settings, passwords, and bookmarks to your Google account. This is a great feature for anyone who switches computers (e.g. work computer and home computer) and needs access to all their bookmarks and account settings. You can log into your Google Account and adjust your sync settings by going into Settings under the "wrench"  or "Menu" icon. 

Pin your frequently used tabs:
Pin your favorite tabs to save space on your tab bar without losing quick access to your favorite pages. In the above picture, you can see we have eight pinned tabs, which would have normally consumed our tab bar. To Pin a tab right-click on any open tab and click Pin Tab. Bonus tip: You can also click-and-drag a pinned tab to the position of your choice. 

Use the Autofill feature: 
Use the Chrome Autofill feature for automatically filling out any online form with common fields such as your name, e-mail, address, etc. To enter the Autofill values follow the below steps.


  • Click on the "wrench"  or "Menu" icon in the top right corner.
  • Click Settings. 
  • At the bottom of Settings, click Show advanced settings. 
  • Click Manage Autofill settings under Passwords and forms. 
  • In the Autofill settings window, click the Add new street address button. 
  • Fill out all address settings you wish to be saved and click OK. 
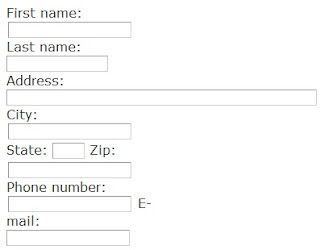
  • Once complete try out your Autofill using the below form. To enter the values click on any of the below fields and select the name of your Autofill. 


Resize text boxes:
Chrome gives you the ability to resize any text field. This can be extremely useful for when you're filling out a form that doesn't seem big enough for all the information you're entering. To resize the text field click-and-drag the bottom right corner of the box. Below is a text field that can be used as an example.

Use the Chrome Task manager:
Since each open tab runs it its own sandbox to help with browser stability, it can be difficult to see the overall system resources being used. For example, in the Windows Task Manager you will see multiple instances of Google Chrome running for each open tab.
Use the Chrome Task manager to show you how much memory and CPU resources each open tab and extension you have installed is using. To open the Task manager press Shift + Esc or Click on the "wrench"  or "Menu" icon in the top right corner, click Tools, and then Task manager. If you want to get real geeky click the stats for nerds click at the bottom of the Task manager.

Quickly close a tab:
Any tab can be closed by clicking on the x on the tab. However, there are much quicker ways to close a tab. For example, if you have a mouse with a wheel pushing in on the wheel anywhere on the tab will close the tab. The shortcut keys Ctrl + W or Ctrl + F4 will also close the current open tab.
Bonus tip: Middle-clicking on any link will also open that link in a new tab.

Use Chrome commands:
Use the chrome:// commands to access many hidden features of Chrome. There is a few dozen of these commands available that will allow you to do everything from viewing DNS information, GPU information, look for conflicts, setting flags, and much more. A listing of these commands can be accessed by typing chrome://chrome-urls in the Omnibox.

Install Extensions:
No Internet browser will have every feature you want, therefore we suggest visiting the Google Chrome Webstore to install free extensions for your browser. Today, there are thousands of available extensions, games, and other add-ons that can be installed into your browser.

Wednesday, January 23, 2013


speed up your computer
Remember the first time you got your Windows computer? It probably loaded almost booted up pretty quick and everything. After months of using it, things started to slow down. It now takes much longer to reboot and the desktop takes a couple of minutes before it completely loads. These are but some of the signs of a slow-running Windows PC and you can make it fast again just like when you first got it we're going to teach you how to speed up the startup time, start menu, and Right Click menu loading of your Windows computer with a few easy-to-do tweaks.

1. Speeding up your Windows PC startup time:

You can optimize your computer's startup speed by launching run on your Windows computer and typing "msconfig" without the quotes. This will take you to the system configuration settings which has five tabs - General, boot, services, startup, and tools.
Under the General tab, you'll find 3 startup selections: normal, diagnostic, and selective. During normal startup, all device drivers and services will be loaded by your computer. If this is ticked, it may be the reason why your computer is taking long. Choose either diagnostic or selective startup to speed up the starting time of your Windows computer. Diagnostic startup loads only basic devices and services whereas with selective startup, you can choose to load neither system services nor startup items. After making a selection select 'Apply.'
Under the boot tab, select advanced options so you can choose the number of processors to facilitate boat speed. If you have a dual-core or quad-core processor, assigning more than one of them to help with the start-up process can significantly boost your computer's speed. Unfortunately, this optimization tweak is not so efficient on power so if you're using a laptop, expect some battery drain after startup.
Finally, there's the Services and Startup tab where you can specifically choose which services and startup items are going to load.

2. Speeding up the right click menu


Yet another disappointing slow down that Windows users experience is the time it takes the menu to show up when hitting the right click. Installing third-party programs that allow you to remove items from the context menu should speed it up.
Author biography: Judene Macariola is a tech geek and a Windows PC expert for 10 years. She works for BroadbandExpert.com which specializes in providing high speed internet advise.


3. Speeding up your Windows Start menu:


The start menu is another serious offender as it often takes time to load. Once need to open run but this time again you, you will type "regedit.exe" to launch the registry editor. Go to the HKEY_CURRENT_USER folder and find Control Panel-> desktop-> MenuShowDelay. Then, double click MenuShowDelay to edit its value. Type in the numbers on the blank and hit "OK." Remember, the lower the value, the faster the start menu will load.
Another trick for speeding up your Windows Start menu would be to limit the number of shortcuts on your desktop. It could be that you just have too many icons on your desktop, and that's what is causing your computer to take long when loading the start menu.

Tuesday, January 22, 2013


View and search all files of a directory in one window as text almost as possible. Search text just by clicking on it copy a phrase and create bookmarks with the same ease. If you have to read through many small ASCII text files, e.g. source code, this tool allows text analysis at extreme speeds. For example, to search a word, forget about opening a dialogue, setting options, clicking through lists to open one result file results after another. No, just type the word - and see all matching text lines across all files, instantly. Then, if you see another word of interest, don't even it - type click on it! And again, you will see all matching text lines, instantly, no matter in what file.

Key features "Depeche view":


  • View all text files of a folder instantly as one long text.
  • Fly over all text by dragging the mouse, like on a Smartphone.
  • Search words by clicking on them, or search expressions with typical them.
  • Use simple English AND text lines per second OR and NOT.
  • Search words instantly in another window.
  • Search more than one million (at 10 times sonic speed).
  •  Windows XP/Vista / 7 application.
  • Free for personal, non-commercial use.


Download: Depeche view


Most people today are using more than just their computer to log into online services making it much harder to manage and store all your passwords between multiple computers, cell phones, and tablets. The service known as Dashlane helps solve this problem by making it easy to store, change, and share all your online passwords between all types of computers, cell phones, and tablets. In addition to managing your passwords the service can also Autofill out any online form, save online electronic receipts, warn you about password vulnerabilities, send you password alerts, generate strong passwords, and much more.
Dashline uses the strongest encryption there is by encrypting all data using AES-256 and only you know the master password since Dashline does not store the master password on any of their servers and not even on your local computer. The master password is also never sent in transmission so it cannot be intercepted by any man-in-the-middle attack. Since the service is a cloud based service, Dashline synchronize your information between computers and devices using a Device Key, which is not related to the master password.

                                                Visit and install Dashlane

Bonus Tip: Click Tools and then Preferences. In the Preferences window click Security and then choose Click to unlock settings. Check the "Automatically log out after inactivity" and specify a time. This will log Dashlane out and prevent anyone who has access to your computer from accessing your accounts.
Computer tips home - Internet tips
View the original article here


Using datemodified: in Windows File Explorer in Windows Vista, Windows 7, and Windows 8 will allow you to find any files that have been modified by a date of your choice. Using this tip can be helpful for anyone who has lost a file but know when they last modified the file. Follow the below steps to get the date or date range window shown in the picture to the right. Open the Windows File ExplorerIn the search box, in the top right corner of the window type datemodified:After datemodified: has been typed the "Select a date or date range" window will appear, select the date or date range for when you believe the file was last modified.Depending on the dates this search may take a few seconds to a minute to complete.

How do I set my browser to Incognito or Private mode?

Note: While in Private or Incognito mode nothing is stored to your computer, however, this does not mean you are anonymous on the Internet. Each page that you visit still recognizes your IP address. Therefore, if someone had the legal abilities to track you using your IP address an ISP, web site, and even a search engine server log may contain your IP address, which could be tracked.

Follow the below steps for your browser to enable Private browsing while on the Internet.

Internet Explorer users:

Keyboard Shortcut = Ctrl + Shift + P
or
Click the Safety drop down menu.Click InPrivate Browsing.

Chrome users:

Keyboard Shortcut = Ctrl + Shift + N
or
Click on the "wrench" or "Menu" icon in the top right corner.Click New Incognito Window.

Firefox users:
Keyboard Shortcut = Ctrl + Shift + P
or
Click Tools.Click Start Private Browsing.See the Incognito definition for further information and related links.

Monday, January 21, 2013


How to disable touch input in Windows 8
Guides Windows 8 developer preview of Windows, the first preview version of Windows 8, allows users to turn off, touch input, without modifying system files or modifying the registry. In the developer preview you could open the pen and touch control panel to see that you disable the touch input.
Microsoft removed this option from the RTM build of Windows 8, and there is no option in Control Panel to disable the touch input.

Users who have Windows 8 on a touch device, and want to touch input, for any reason, follow the instructions below to completely disable touch input in Windows to turn off the eighth

NOTE: If the touch input is disabled, you will not be able to shutdown, restart or perform other actions on the touch screen. So go with these instructions only if you have a couple of physical keyboard and mouse. Note that Windows does not allow even the touch input after a restart. Do you have the original settings to make your touch again.
We tested this in Windows 8 races in Pro ax 86 tablets. This manual may not work on Windows-based devices RT.

Step 1: Start Device Manager. To do this, press Windows + R key combination to open the first Run dialog, type devmgmt.msc in the box and then press the ENTER button.

Step 2: Once you start the Device Manager, look for an entry called Human Interface Devices (HID) and expand the same. You'll see four or more entries HID compliant device.
Step 3: Right click on each HID-compliant device entry one-by-one and tap disable option to disable the touch input. Make sure you disable all HID-compliant devices. When you tap the disable option, you might see "Disabling this device will cause it to stop functioning. Do you really want it? to disable"message. Tap Yes button. That's it! Once disabled, you will need a keyboard or mice to control your tablet or touch device.
To enable the touch input again, open up the Device Manager, right click on each human interface device entry one after another and click Enable option using your physical keyboards or mice.

freeware majority of Windows users use Microsoft Office suite to read and edit documents, Adobe Reader or soda 3D PDF reader to read portable document format files, paint.NET or other image editing tools to view and edit pictures, VLC, GOM, or MPC to watch videos, and 7-zip, WinRAR, WinZip program to extract compressed files.
While there is absolutely no shortage of applications to read documents, open multimedia files or extract zip files, wouldn't it be great if it was possible to open popular file format using one program?
Free Viewer is a fantastic piece of software to open your documents, pictures, zip files, and video files. This free tool supports Microsoft Office files (.docx, .xlsx, .pptx, .doc, and .xls), word perfect file (.wpd), open Office documents (.odt), raw image files (.arw,. cf2, .crw, .org,. raf and .raw), Adobe Photoshop (.psd) images, camera pictures (.jpeg, .jpg, .gif, .png, and .tiff), video file formats (.avi, .mpg, .mpeg,. mp4, .mkv, and. 3gp), audio files (. mp3, .mid, .flac, .wma and .ogg), Flash movies (. swf), and compressed files (. 7z, .zip,. rar, .gz, .tar, .tgz, and .jar).

Free viewer not only lets you open documents and pictures but also lets you edit them. For instance, when you open a document (.docx), Free Viewer you will see basic options to edit the document. You can also use FreeViewer to resize, crop, rotate, and change brightness/contrast of a picture. Of course, this tool offers only basic editing options. Overall, a mobile piece of software for Windows.
Free viewer is compatible with Windows XP, Vista, Windows 7 and Windows 8 operating system. The download size of the program is 30 MB and takes ~ 70 MB of disk space.
Download Free Viewer (Via)

freeware-dropbox, the popular cloud storage provider, has released dedicated Windows 8 app and is now available in the store. While dropbox for Windows 8 app can be installed alongside the desktop version of dropbox, it's more useful for users who're using a tablet or touch device powered by Windows RT operating system.


The initial release of dropbox is missing most features and options present in the desktop version. For instance, you can't upload or download your files using the current version of the app. It doesn't let you share link, delete, rename, and move files as well. You can only browse your dropbox account and preview files.

The app sports a simple and touch-friendly interface. Once installed, launch the app by clicking or tapping on the dropbox tile on the start your dropbox enter credentials screen, and finally click log in button to start syncing with the cloud.
To sign out, open up the app, access the charms bar by swiping - in from the right edge of the screen (or move mouse cursor to upper or lower right corner of the screen), click settings, click account, and then click sign out button.

Dropbox app is completely free for users running Windows 8 and Windows RT operating systems. If you're running Windows 8 or Windows 8 Pro version, we recommend you download the desktop version of dropbox for Windows 8 to get easily manage your account. And if you're using Windows RT powered devices such as Microsoft surface RT, check out the feature-rich all my storage or cloud save app to manage your cloud accounts, including dropbox.

Dropbox (Windows store link)

freeware, Windows 8, user needs to switch to the start screen in order to launch apps and legacy desktop programs. While it's possible to create of legacy programs on desktop, Windows 8 shortcuts doesn't allow you create desktop shortcuts of installed apps from the official store.
A number of free software are around to enhance the Windows 8 user experience. There are free applications to change home screen background, change the default number of rows on the start screen, disable charms bar & hot corners, show taskbar in startup screen, and there is even a program to create apps shortcuts on the desktop but it supports only apps that ship with Windows 8 Up until now, there was no concrete solution available to create desktop shortcut for any app in Windows 8.


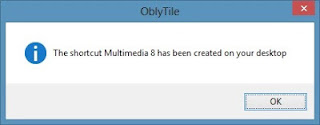
Users who would like to launch apps from desktop by creating apps shortcuts on desktop will be glad to know that it's now possible to create desktop shortcuts for installed apps in a few mouse clicks. The developer of OblyTile, the program which lets you create your own tiles on the start screen, has updated the software and it's now capable of creating desktop shortcuts for installed apps.
Here is how to create desktop shortcut for an app:
Step 1: Download and run OblyTile on your Windows 8 machine. Please note that it supports 32-bit and 64-bit Windows 8 system only, and you can't run the same on Windows RT (see difference between Windows 8 and Windows RT).
Step 2: Click on the small folder icon that you see on the upper right of the program dialog to open tile Manager.


Step 3: Next, click on the small Windows logo icon to load all installed apps and native Windows programs.


Step 4: Select name from the list the app and then click Create shortcut for the selected app to create the shortcut of the app on desktop. That's it!


Posted January 10, 2013-10: 30 pm in: freeware Yahoo! mail may not be the best webmail service out there but it still has a ton of users. Just a week ago, we let you know about the availability of the official Yahoo! mail app for Microsoft's latest Windows 8 operating system.
The initial version of Yahoo! mail comes with a good interface and all the basic features that you would need. By installing and adding your Yahoo! account, you could'nt easily read latest messages and so send messages without having to open your web browser!


One of our readers, recently left a comment on our Yahoo! mail app for Windows 8 article asking how to sign out or log out of the account in Yahoo! mail app. If you too have installed Yahoo! mail app in Windows 8 and are looking for the sign out option in the app, you need to follow steps given in this article.
Signing out of your Yahoo! account in Yahoo! mail is fairly simple. Just like the native mail app, Yahoo! mail doesn't display the sign out option by default and you need to access the same by opening the settings charm. Complete the given below instructions to sign out of your Yahoo! account in Yahoo! mail app for Windows 8.
Step 1: Launch Yahoo! mail app.
Step 2: Once the app is launched, move the mouse cursor to the upper or lower right corner of the screen to view the charms bar. And if you're on a touch device, simply swipe in from the right edge of the screen to reveal the charms bar.


Step 3: Click charm on settings , and then click Sign Out option to sign out of the account. That's it!


And if you don't like the official Yahoo! mail app, we suggest you try out the mail app that ships with Windows 8. The mail app is pretty good and lets you add and configure your Hotmail, Gmail (see how to add Gmail to Gmail app), and Yahoo! webmail accounts in a few steps.

Posted January 14, 2013-8: 11 pm in: Windows 8 guides computer users who have ever used a notebook or netbook know the basics of using a trackpad or touchpad as a pointing device, but not everyone knows that Microsoft's latest Windows 8 operating system includes a couple of new touchpad gestures as well.
Users who have used a laptop powered by Windows 7 or earlier versions of Windows know that one can use the touchpad to a left click, right click, double click, move the mouse cursor, and so scroll a page. Some touchpads let you zoom - in or zoom-out as well.
With Windows 8, Microsoft has introduced hundreds of new features. Charms bar and app-switch, and app bar are the three of the hundreds of new features in Windows 8 and can be revealed with the help of touchpad or tracked gestures.


In Windows 8, moving the mouse cursor to the upper or lower right corner of the screen reveals the charms bar and moving the cursor to the left edge of the screen brings up the app switch to quickly switch between running apps. If you running Windows 8 on a compatible notebook or if you have purchased a notebook preinstalled with Windows 8, you don't need to use the mouse cursor to access app switch or charms bar. You can simply use the edges of the touchpad to access them. For instance, on a compatible touchpad, swiping from the right edge of the touchpad to the left reveals the charms bar and swiping from the left edge of the touchpad to the right brings up the app switch.
Users who have upgraded their Windows 7 laptops of to Windows 8 may need to enable the touchpad gestures by following our how to enable touchpad gestures in Windows 8 guide. Following are the new touchpad gestures introduced with Windows 8:
# Slide in from the right edge of the touchpad to view the charms bar. As you may know, charms bar lets you quickly access startup screen, settings, share, devices and settings options.


# Slide in from the left edge of the touchpad to view the app switch or switcher to quickly switch between running apps.


# Swipe down from the top edge of the touchpad to display app's bar or home screen app bar. You can also use Windows + Z hotkey or right-click anywhere on the screen to reveal the app bar.


# Rotate to perform action, move two fingers on the touchpad and then move them in a circle. # Move two fingers on the trackpad, and then move them from right to left or left to right to perform horizontal scrolling.
# The pinch gesture lets you zoom in and out. Place two fingers on the touchpad and then move them towards each other or move them in opposite direction to perform zoom out.


Posted January 18, 2013-12: 38 pm in: freeware computer users who have upgraded from Windows Vista and Windows 7 to Windows 8 probably aware of the fact that Aero glass transparency isn't available in the newest version of Windows operating system. Aero glass, a feature introduced with Windows Vista, which dropped from Windows 8 to improve overall Windows performance and power efficiency.

While it's possible to enable Aero glass in Windows 8 without installing third-party visual styles and tools, the result is buggy. However, one can install a third-party Aero glass theme in Windows 8 to get the missing feature. Users who would like to enable the Aero without installing third-party visual styles can now download and run a tiny tool named WinAeroGlass.

Our friend at WinAero has released a free tool named WinAeroGlass to enable Aero glass in Windows 8 this free tool aims to bring Aero glass transparency to the latest version of Windows. Enabling Aero with WinAeroGlass is a cakewalk. Download and run the tool to enable the Aero glass. And the good thing is that it doesn't even ask you to restart or log off.
It's important to note that the current version of the tool has no user interface. So you won't see anything on the screen when you run this program.


The developer of the program is working hard to enable the blur effect and the feature will be available in future releases.

To revert to the original Windows 8 visual style, right click on desktop, click personalize to open Personalization window, and then click on one of the default Windows themes.
Please note that WinAeroGlass is currently in pre beta stage and you might encounter issues while running the tool. We suggest you create a manual system restore point before running the tool.
Download WinAeroGlass


Download WinAeroGlass